There’s a well-known maxim in business, fitness, and pretty much anything involving human performance: You can’t improve what you don’t measure. The gist of this statement is that you must measure and record your performance in any skill you wish to improve to track progress and motivate you to greater success. Whether or not you subscribe to this theory, it’s very relevant to the shooting world. Hunters, competition shooters, and anyone who owns or carries a firearm for defensive purposes should practice regularly and measure their performance to maintain proficiency in important skills and improve where needed.
Multiple drills have been developed for handgun shooters to test their abilities and help inspire improvement. In this article, we will go over the basics of some of the most popular and beneficial handgun drills. So grab your shot timer and your CCW rig, and let’s get started!
Please note: This article is provided for informational purposes only. Neither Liberty Safe nor the author assumes any liability for using or misusing this information. We recommend getting professional firearms instruction before handling or using any firearm.
An important note on reholstering a loaded firearm: Some ranges don’t allow users to reholster loaded firearms or, in some cases, to draw from a holster at all. Be sure to check your range’s rules. The reason for this abundance of caution is that reholstering is by far the most common time when negligent discharges happen (people firing shots unintentionally). If your range doesn’t permit drawing from a holster or reholstering on the firing line, you can still see great improvements by practicing drawing your firearm from your holster and dry firing at home with an empty firearm. If your range DOES permit reholstering a loaded firearm, be extra vigilant and careful to keep fingers, items of clothing, etc., out of the trigger guard when reholstering. Do it deliberately and carefully every time. Don’t get complacent, and just shove your gun into your holster. Bad things can happen. Okay, let’s get to the drills!
Video: Is Appendix Carry Safe?
The Mozambique Drill (Failure to Stop)
The Mozambique drill is sometimes known as the Failure to Stop drill, the Failure drill, or simply two to the body, one to the head. It originates in a Rhodesian mercenary, Mike Rousseau, who fought in the Mozambican War of Independence. He shot an armed enemy twice in the chest from around 25 feet, but it failed to stop the man. Rousseau then shot the advancing combatant once more in the head/neck, severing his spinal cord and dropping him. Brutal, but real-world gunfighting isn’t often nice. Rousseau related the account to the famed handgunner, writer, and instructor Jeff Cooper, who incorporated the drill into his training program at Gunsite Academy. From there, it spread to the LAPD SWAT team and has been popularized at multiple other training centers.
How to set up and shoot the Mozambique or Failure drill
Stand facing the target (USPSA, IDPA, or other torso-type target with a defined chest and head area) with your handgun loaded and holstered. Generally, instructors have students start with their hands in the surrender position (wrists and hands above shoulder level), but you may also start with your hands relaxed at your sides. (Beginners or those restricted from drawing from a holster due to range rules can start with their handgun at a low-ready position: Both hands grasping the gun, eyes on the target, muzzle pointed down at roughly a 45-degree angle at the base of the target stand or the ground below the target.) The standard drill is usually shot from 7 yards, but you can try closer or farther distances as desired. On the signal or beep (we strongly recommend using a shot timer), draw and fire two shots to the center scoring area of the target (the A zone), and then one to the head area.
So, what’s a good time for the Mozambique or Failure drill? From the standard 7-yard distance above-average shooters should be able to complete this drill in 2.5 seconds or less, drawing from the holster. Experts can shoot it in around 1.5 seconds. If you’re a robot like Bob Vogel, you might be able to shoot a clean Mozambique drill at 6 feet in under a second. But it takes most of us mere mortals a little longer, particularly if you extend the distance to the target out to 10 or 12 yards.
The Mozambique drill is useful as a practical defensive handgun drill as it develops a rapid draw, two quick and reasonably accurate shots to the target’s center mass, a theoretical assessment of those shots’ effectiveness, and then a more precisely aimed shot at the head of the target. In reality, not many people actually practice pausing after the initial two shots, but rather they practice drawing and shooting two shots to the body and one to the head as quickly as possible.
Video: The Mozambique Drill
If you’re able to shoot a clean Failure drill from the holster in less than 2 seconds from 3, 5, or 7 yards, try moving the target out farther and/or decreasing the size of the acceptable scoring area to increase the difficulty and keep developing your skills. You can also incorporate this drill into your rifle training, which is a good idea for people who may have to defend themselves against people wearing body armor, where shots to the body may be ineffective.
The Mozambique drill is useful as a practical defensive handgun drill as it develops a rapid draw, two quick and reasonably accurate shots to the target’s center mass, a theoretical assessment of those shots’ effectiveness, and then a more precisely aimed shot at the head of the target. In reality, not many people actually practice pausing after the initial two shots, but rather, they practice drawing and shooting two shots to the body and one to the head as quickly as possible.
The Bill Drill
This popular drill was most likely invented by and named after Bill Wilson, noted competitive shooter and founder of Wilson Combat, maker of premium 1911 pistols. Or, it may have been developed by Bill Rogers or Bill Jordan. The history is a little unclear, but the goal of the Bill Drill isn’t. You need to draw and fire six accurate shots as quickly as possible. It sounds super simple, but if you’ve tried it, you know it can be a real bear.
How to set up and shoot the Bill Drill
Set up a standard IPSC (the original target for the Bill Drill), IDPA, or USPSA target 7 yards downrange. Stand facing the target, handgun loaded and holstered. You may start either with your hands in the surrender position or with your hands at your sides. On the start signal, draw and fire six shots into the A zone (center scoring area) as quickly as possible. However, only A zone hits count. You must shoot it clean to pass the drill.
The Bill Drill strengthens your handgun shooting skills in 4 important areas. First, it emphasizes the need for a clean, fast draw from the holster. A flubbed draw will kill your time. Second, it helps you speed up your trigger finger for quick follow-up shots. Third, it trains you to develop a solid stance and grip for effective recoil control. Fourth, it requires you to understand rapid sight picture and sight alignment to allow those six shots to be as accurate as they can be while still shooting very quickly.
Video: How to Shoot the Bill Drill
The tendency of almost all shooters who first attempt the Bill Drill is to draw, align the sights in the center of the target, and then just hammer the trigger as fast as they can to try to get a good time. This results in wild shots and some of them may not even hit the target at all. It might surprise you how easy it is to miss at 7 yards (though anyone who reviews police or self-defense shooting footage will understand how common it is for people to miss in stressful situations).
The main key to achieving an acceptable time in the Bill Drill when shooting handguns with iron sights is to focus on the front sight and develop a cadence of fire where you break the next shot just as the sights come back into acceptable alignment within the A zone of the target. If your handgun is equipped with a red dot optic, you focus on the target and practice breaking your shot just as the dot returns to the A zone scoring area. Passing the Bill Drill requires excellent trigger control, an effective grip, and intense focus on your sighting system.
The difficulty increases greatly due to the requirement of 6 rapid shots. Some people can fire accurate hammer pairs or double taps accurately, but add a third, fourth, fifth, or sixth shot and their accuracy falls off a cliff. This is what makes the Bill Drill so difficult, and so valuable.
Dry fire practice can help immensely with shortening the time it takes you to acquire a firing grip on your handgun, make a clean, rapid draw, align the sights on the target, and press the trigger cleanly for that first accurate shot. (A good goal is to try for a time of around 1 second to get this done. Setting a 1.75 par time on your shot timer and trying to break the shot before the second beep is a good starting point. Then reduce the par time to 1.5 seconds, 1.25 seconds, etc.).
However, the remaining 5 rounds required by the drill really require significant live-fire training to understand how to make rapid, accurate hits while managing the recoil of multiple shots. Each handgun recoils and returns from recoil differently, so if you get good at shooting the Bill Drill with one type of handgun, it definitely doesn’t mean you can do it with another type of handgun. For concealed carry, military, or police/duty use, it’s important to shoot the drill with your carry gun or duty sidearm so you develop the skills necessary to stop the threat with your primary handgun if things go bad.
So, what’s a good time for the Bill Drill? The most commonly repeated goal is for you to shoot a clean Bill Drill in 2 seconds or less. However, that’s a goal that really is achievable only by top-level shooters. If you can reliably shoot a Bill Drill from the holster at 7 yards in under 2 seconds, you can consider yourself an expert-level shooter (at least on that drill). For most people, it’s more productive (and less depressing) to set your initial goal for the Bill Drill at four seconds and then work on reducing those times to 3.5 and then 3 seconds.
If you are an alien or robot and find the 2-second goal easy to achieve, you can increase the difficulty of the Bill Drill by moving the target out to 10 or 12 yards or reducing the size of the acceptable scoring area (for example, restricting yourself to the head scoring area of an IDPA or USPSA target). But in that case, you’re probably already a professional-level shooter and may not be reading this introductory article in the first place.
The El Presidente Drill
The El Presidente drill, sometimes colloquially shortened to El Prez, is one of the most famous handgun training drills worldwide. It was developed (but not named) by Jeff Cooper while training with the protection detail of South American presidential protection personnel. (Note: some sources claim South African, and Cooper worked with protection forces in South Africa, Guatemala, and El Salvador. However, the name is Spanish, so we choose the South American option.)
The El Presidente, so named when the drill was incorporated as a standard IPSC competition stage, is a fantastic drill for developing multiple defensive-shooting skills, incorporating physical movement, a rapid draw, quick/accurate shots while transitioning between multiple targets, and an emergency reload from slide lock.
How to set up and shoot the El Presidente drill
For this drill, you will need three IPSC/IDPA/USPSA targets placed next to each other, approximately 1 yard apart and 10 yards away from the shooter’s position. Generally, this type of torso target is preferred, but what type of target you choose is not super-critical.
You begin this drill with your firearm loaded (see below) and holstered, as in the previously discussed drills. However, with the El Presidente, you begin facing away from the targets, with your hands in the surrender position (wrists/hands above the shoulders). Your handgun should be loaded with six rounds ONLY. You also need a spare magazine/speedloader with at least six rounds ready to go.
Video: How to Shoot the El Presidente Drill
Note: Some ranges prohibit shooters from facing rearward for the beginning of a drill, even if the range allows drawing from a holster. So be sure to ask your Rangemaster if the El Prez is allowed.
Upon the start signal/beep, you turn toward the targets, keeping your strong side/handgun on the inside of the turn. In other words, if you shoot right-handed and your firearm is in a holster on your right side, you turn to your right, pivoting on your right foot. If you’re using an appendix holster, turn toward your strong/dominant-hand side. When you are facing downrange toward the targets, and it’s safe to do so, draw your handgun and fire two shots into each target, reload, and fire two more shots into each target.
The order in which you engage the targets doesn’t really matter, though it’s the source of many an internet argument. Some people prefer to shoot them left-to-right (1-1-2-2-3-3) and then right-to-left (3-3-2-2-1-1) after the reload. Some people do the reverse. Some people prefer to shoot 1-1-2-2-3-3, reload, and then 1-1-2-2-3-3 again. Whatever you find preferable is fine.
Since the El Prez incorporates so many different skills, it’s useful to break them down into individual sections before incorporating them all together. For example, you can easily practice the turn and draw (and even the reload) during your dry-fire practice.
For a smooth turn, you want your weight mostly on the balls of your feet. Push off with your weak-side foot and look around with your head toward the first target you will engage. Avoid shuffling your feet or taking multiple steps as you turn. Ideally, you want your strong-side foot to pivot smoothly while your weak-side foot pushes off and lands in a stable shooting stance facing the targets. As soon as your upper body is facing safely downrange, your eyes should be locked on your first target, and you should be drawing your gun.
For a clean, efficient draw, you must prioritize acquiring a correct, solid firing grip on the gun before it clears the holster. If you have to slide the gun around in your grip while you’re presenting it to the targets, you’ll lose valuable time. This is another area where consistent dry fire practice and holster presentation drills (see below) can work wonders. In fact, if you have difficulty getting a good firing grip as you draw, just work on that much… move your hands from the surrender position to having your strong hand grasp the grip of your firearm, and stop. Repeat this until it becomes second nature.
Once you’ve established a good, solid grip on the gun, draw it straight out of the holster, meet the gun with your support hand, establish your final firing grip, and drive the muzzle toward your first target. As your arms reach their full shooting extension (elbows slightly flexed, ideally) you should be taking a split second to confirm a good sight picture with either your front sight or your optic’s reticle centered in the A zone of the target. It’s tempting to start shooting as soon as your muzzle is pointed at the target to get a faster time but remember, only accurate hits matter.
As in the Bill Drill, you want to be running the trigger as quickly as you can get acceptably accurate hits on target. If you establish a very firm grip using both hands, you can be a little more sloppy with the trigger, and it won’t drop your shots out of the A zone.
Moving your eyes: It may be tempting to keep your eyes sharply focused on your sights as you transition the firearm from target to target, but experienced trainers and shooters know the best results occur when you move your eyes to the next target as soon as the last shot breaks on the first target. Your gun then follows where your eyes are looking.
Remember, you’re not trying for one-hole groups here. You’re trying to get shots center mass on three targets as quickly as possible. Jeff Cooper remarked that the strings of 6 shots should ideally sound like a regular cadence of shots, equally spaced apart, rather than 2, then 2, and then 2. That will require that your eyes and your gun transition quickly from target to target to target.
For a smooth reload, you need to take the time to build familiarity with your equipment. Whether you’re drawing a spare magazine or speedloader from your pants pocket or retrieving it from a pouch on your belt, don’t try to rush it at first. Go slow and ensure your movements are efficient and then increase the speed as you gain experience. Your support hand should be moving to your spare ammunition as soon as the 6th shot is fired, while at the same time, your strong hand is pressing the magazine release button. If you’re shooting a revolver, your support hand needs to help eject the empty cartridge casings first and then move to your speedloader or moon clip for the reload. Keep your gun elevated enough to see the targets and manipulate it safely and smoothly. Insert your fresh supply of ammunition, reacquire your sight picture, and fire your remaining six shots, two each, into the targets in whatever order you prefer.
So, what’s a good time for the El Presidente drill? Competent shooters should be able to complete the El Prez in under 10 seconds with all A-zone hits. As with the Bill Drill and the Failure drill, it’s very tempting to go as fast as you can pull the trigger to get a good time. However, Your first priority should be accuracy. As you gain experience and familiarity, you can speed up, all while keeping acceptable accuracy as the first priority.
If you are shooting consistent times but are throwing some of your shots outside of the center scoring area of your targets, that’s an indication that you need to slow down a little and focus more on accuracy. If, on the other hand, your shots are tightly clustered in the center of the A zone, you can probably speed up a little while maintaining A-zone hits.
The Holster Presentation Drill
We talked a little about this drill in the sections above, but the main goal of the holster presentation drill is to become extremely proficient in acquiring a good, solid firing grip on your gun before you draw. Then you draw your gun straight out of the holster, build the rest of your grip using your support hand, and push your muzzle toward your target, aligning your sights as you do so. You can choose whether to break a dry fire (empty gun) shot on the target as you see an acceptable sight picture, or just reholster your gun and try it again.
How to set up and perform a holster presentation drill
This drill may optionally be performed on a live range using live ammunition and include a first shot on target, or it may be performed with an empty gun at home (or at the range). You can choose to use a target at the range, or you can just pick out a light switch or other safe-to-aim-at object using your confirmed-empty gun during dry fire practice at home.
Start with your firearm holstered and your hands either relaxed at your sides or in the surrender position with your wrists/hands above your shoulders. It’s most useful to incorporate a shot timer with this drill (as with all of these drills) but if you don’t have one yet, you can still build solid repetitions just by going through the motions of a clean draw/presentation of your handgun from the holster.
Video: Rōnin "Presentation" Drill
On either the signal from the timer or your mental GO signal, quickly acquire a solid firing grip on your handgun with your strong hand. Your support hand should be open and move quickly toward the centerline of your body, ready to meet your strong hand and the gun. Draw the gun in one smooth action, and as you begin moving the muzzle toward the target, bring your support hand together with the firearm and build your full firing grip and complete the presentation of the gun to the target and line up your sights.
So, what’s a good time for a holster presentation drill? Very proficient shooters can draw from the holster and place an accurate shot on target in one second or less, so that’s a good goal to shoot for (see what we did there?). If you choose to incorporate a live first shot into this drill at the range, we recommend setting a par time on your shot timer to two seconds to start out. If you’re not finished completing your drawstroke by the time the second beep sounds, don’t fire your shot, but rather safely reholster (if permitted at your range) and try again. If you find you’re regularly unable to get your sights aligned on the target in under 2 seconds, work on it during dry-fire practice at home until you can consistently break a dry-fire shot on target before the 2-second par buzzer sounds. Then, you can reduce that time to 1.75 seconds, then 1.5, etc., before practicing any live-fire drills.
A clean, one-second draw time to a first accurate shot on target is a worthy goal for every handgunner to work toward, and the holster presentation drill is a great way to get moving toward that goal.
The Dot Torture Drill
This is technically more of a test than a drill, as it involves lots of slow-fire shooting on small circles or dots on one sheet of paper, but it involves several mini-drills during the process. David Blinder of Personal Defense Training originally developed the dot torture drill (DTD). (It appears his website is no longer functional.) Some informed trainers don’t like using the DTD and would prefer using the required 50 rounds of ammunition for something they feel develops necessary skills faster and better. Still, in our experience, the dot torture drill can be a real eye-opener. It shows you where you stand regarding good sight alignment, trigger control, stance, grip, and other good shooting fundamentals.
And, as the name implies, the higher round count and the longer time involved to complete the DTD compared to some of these other drills adds pressure, as you have to shoot it 100% clean to pass (all shots must be placed within the circles or, if you’re feeling generous, breaking the line to count). When you’re concentrating hard and made 48 clean shots in a row, but you throw the 49th or 50th outside of the last dot… it can feel torturous.
How to set up and shoot the dot torture drill
This is a drill that requires the use of a specific target or making your own substitute. The official dot torture target has ten 2-inch circles or dots shot in a specified manner. You can purchase dot torture targets, or you can print your own here courtesy of pistol-training.com.
The target range can vary, but we recommend starting out at either three or five yards. If it sounds like that’s too close, try it. We bet you won’t be able to pass the DTD test your first time with your carry rig, even from three yards.
Video: Start Shooting Better With Dot Torture Drill
The intent of the DTD is to use your CCW rig and draw from your holster. If your range doesn’t allow drawing from a holster or re-holstering, you can still get value from the DTD starting each string from low ready.
Here’s how to shoot the DTD:
- Dot 1 – Draw and fire one string of five rounds, trying for your best group (one hole if possible). Take as long as you want.
- Dot 2 – Draw and fire one shot, carefully reholster (if allowed), and repeat four times, for a total of 5 rounds.
- Dots 3 & 4 – Draw and fire 1 shot on dot #3, then one shot on #4, holster and repeat three times, for a total of 8 rounds.
- Dot 5 – Draw and fire a string of 5 rounds, strong hand only, for a total of 5 rounds.
- Dots 6 & 7 – Draw and fire 2 shots on dot #6, then two shots on #7, safely reholster, and repeat 3 times, for a total of 16 rounds.
- Dot 8 – Starting weak hand only from ready or retention position (don’t use the holster here), present your firearm to the target and fire five shots for a total of 5 rounds. As with all the other dots, take as long as needed to make clean, accurate hits.
- Dots 9 & 10 – (You will need a spare ammunition magazine to complete this portion.) Draw and fire 1 shot on #9, perform a speed reload, fire one shot on #10. Holster, retrieve your magazine and replace it where you need it; repeat two more times for a total of 6 rounds. (Note: if you don’t have a spare magazine, you can just remove the magazine from the gun after the first shot, set it down on the shooting bench or place it in your pocket, then retrieve it and reload for the second shot.)
In the rare case that you find this drill or test easy from 5 yards, try it at seven and then ten yards. The DTD is probably not the best drill to develop speed, but if you want to add some additional pressure, set a 3-minute par time (we’d actually start with 5 minutes) and keep track of how long it takes you to complete all 50 shots accurately. If you like the drill and find it valuable, reduce your par time by 15 seconds at a time and try the drill again.
Remember, if you place a single shot outside any of the dots, you fail, and you have to start over with a new target. It’s called the Dot Torture drill for a reason.
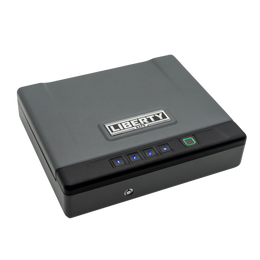
Liberty Safe Security Drill
This one is tongue-in-cheek but emphasizes the importance of knowing how to open your safe quickly and efficiently. Time yourself and learn how long it takes you to open your gun safe in its most common state (whether fully locked or using the Day Lock feature). Note any inefficiencies or fumbling, and see if you can improve your time through repetition. It’s a good idea to practice at least weekly.
This works with dial locks, electronic keypad locks, and handgun vaults. If you find it takes you longer than you’re comfortable with to access your firearm, look into a quicker-access security method (such as utilizing the Day Lock feature when you’re at home), or using one of Liberty’s quick-access handgun vaults.