


A practical, home-based checklist for hunters who want their gear ready—without the last-minute scramble
Turkey season prep isn’t only about what you pack—it’s about how you store it the rest of the year. When gear is organized, protected from heat, humidity, and everyday household traffic, it’s easier to do a quick pre-trip check and head out with confidence. This guide covers a proven loadout framework, plus simple storage and organization steps that help keep firearms-related accessories, calls, optics, tags, and important documents in one reliable place.
Why “gear loadout” starts at home (not in the driveway)
Most turkey-season oversights happen at home: a headlamp with dead batteries, a missing choke wrench, a slate call you can’t find, or paperwork you set “somewhere safe.” A repeatable home setup solves that by creating:
For many households, the best staging zone is a secure safe area paired with a small “ready bin” for non-sensitive items (gloves, gaiter, bug repellent, snacks) kept nearby.
1) A staging zone: a single spot where your hunt kit lives year-round.
2) A protection plan: storage that shields metal, leather, paper, and electronics from heat, moisture, and dust.
3) Fast access: a layout that makes “grab-and-go” realistic on early mornings.
Build your turkey season loadout: a simple, repeatable framework
Instead of a giant list that changes every year, organize your loadout into five “modules.” Each module can live in its own pouch or labeled container—then you only swap what changes (weather layers, permitted items, local tags).
Module A — Essentials: license/tags, small first-aid kit, lighter/fire starter, navigation basics, water, snacks.
Module B — Calling & Decoys: mouth calls (case), slate/glass (conditioned), striker storage, decoy(s), stake/cord.
Module C — Optics & Electronics: binoculars, rangefinder (if used), headlamp, spare batteries, charger cable.
Module D — Tools & Maintenance: multi-tool, small field cleaning items, choke tool, small roll of tape, zip ties.
Module E — Comfort & Conditions: gloves, face cover, sit pad, rain shell, hand warmers, insect protection (season dependent).
Storage priorities: protect what matters, organize what moves
A good home storage plan separates items by two questions:
Does it need protection from heat, moisture, and smoke?
Paper documents and many valuables are temperature-sensitive. A common benchmark for paper protection is a fire classification designed to keep interior temperatures below about 350°F for the rated time (often referenced as “Class 350”). (mesasafe.com)
Paper documents and many valuables are temperature-sensitive. A common benchmark for paper protection is a fire classification designed to keep interior temperatures below about 350°F for the rated time (often referenced as “Class 350”). (mesasafe.com)
Does it need consistent, secure home access?
Your “core loadout” benefits from one secure location with a repeatable layout—so you’re not hunting through closets, garage bins, or glove compartments the night before.
Your “core loadout” benefits from one secure location with a repeatable layout—so you’re not hunting through closets, garage bins, or glove compartments the night before.
A practical approach is a “two-tier” system: (1) protected storage for important documents and select valuables, and (2) a labeled, mobile-ready kit (pouches or bins) that you can pull out quickly for a final check.
Did you know? Quick facts that influence how you store gear
Home fires can move fast. The U.S. Fire Administration notes people may have less than 2 minutes to escape once the smoke alarm sounds—making early warning and planning critical. (usfa.fema.gov)
Smoke alarms age out. The American Red Cross recommends replacing smoke alarms that are 10 years old. (redcross.org)
Fire ratings aren’t all the same. Independent testing methods and test curves can differ—so it’s worth understanding what a rating actually represents before you rely on it for documents or heirlooms. (gunsafereviewsguy.com)
Step-by-step: Set up a “72-hour turkey season ready” system
This is a straightforward way to make sure you can be ready to hunt within 72 hours—whether you’re waiting on a weather window, coordinating time off, or just trying to avoid last-minute shopping trips.
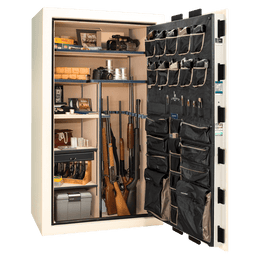
1) Create a single “Loadout Shelf” (one zone, one standard)
Use one dedicated shelf, cabinet, or safe interior section for Modules A–E. Consistency beats creativity here—put items back in the same place every time.
2) Label by function, not brand
Labels like “CALLS,” “DECOY KIT,” “BATTERIES,” and “TOOLS” make your layout intuitive for you (and anyone in the household who might be helping you find something quickly).
3) Add light so you can confirm your loadout fast
Interior lighting reduces “missed item” mistakes—especially in early mornings. If you keep gear and accessories in a safe, a dedicated LED kit can make it easier to check pouches, shelves, and small parts in seconds.
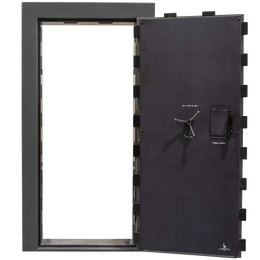
4) Secure the storage location (and make it stable)
If you’re placing a heavy safe in a garage, basement, or on a slab, anchoring can help keep it stable and reduce shifting over time. Anchoring methods vary by floor type and safe design; concrete anchoring typically involves drilling and installing purpose-built anchors. If you’re not sure what’s right for your home, get professional guidance for your floor type and load. (maden.co)
5) Use a 3-check rhythm: weekly, monthly, and pre-trip
Weekly (2 minutes): quick glance—calls, decoy kit, headlamp present.
Monthly (10 minutes): replace/rotate batteries, check straps, confirm your “small tools” pouch hasn’t been borrowed for other projects.
Pre-trip (15 minutes): weather-based clothing adjustments, confirm optics are clean, confirm any required paperwork is in your Essentials module.
6) Keep a reliable backup light in your staging zone
A compact, bright handheld light is helpful for quick checks in closets, truck beds, and gear corners.
Quick comparison table: What goes where in a smart home loadout setup
| Item type | Best storage style | Why it works | Pre-trip check |
|---|---|---|---|
| Calls & small accessories | Labeled pouch/bin; easy lighting | Stops “lost in the junk drawer” problems | Confirm each call is present + conditioned |
| Optics & electronics | Protective case; dry, dust-controlled space | Reduces scratches, moisture exposure, and dead batteries | Clean lenses; verify battery/charge |
| Documents & small valuables | Fire-rated, protected storage | Prioritizes heat protection for important paper items (safesandmore.com) | Confirm your “essentials envelope” is current |
| Tools & maintenance items | Small organizer box in same zone | Keeps tiny parts from disappearing | Count your “critical smalls” (tool, tape, zip ties) |
A United States angle: prepping for wide-ranging conditions
Across the United States, turkey seasons and spring conditions vary widely—wet mornings in one region, dry dust in another, and big temperature swings almost everywhere. Two practical moves help in nearly any state:
When your household systems are dialed (escape plan, alarms, organized storage), your hunt prep tends to become calmer and more consistent, too.
Standardize your core kit (Modules A–D) and only swap the comfort/conditions module (Module E).
Do a home safety refresh at the same time you do gear prep—test smoke alarms and review your home escape plan so your household is ready year-round. (redcross.org)
Want help choosing the right safe setup for your home and routine?
Liberty Safe can help you think through size, placement, organization accessories, and everyday usability—so your storage supports your lifestyle (not the other way around).
Prefer self-service? Start at LibertySafe.com.
FAQ
What’s the fastest way to stop forgetting small items like strikers, batteries, or tools?
Use labeled pouches by function (CALLS, BATTERIES, TOOLS) and keep them in one consistent “loadout shelf” zone. Add interior lighting so you can visually confirm contents in seconds.
How often should I review my home fire readiness while I’m doing gear prep?
A simple cadence is twice a year for practicing a home fire escape plan, plus monthly smoke-alarm testing. USFA emphasizes the value of making and practicing an escape plan, and notes people may have less than 2 minutes once the alarm sounds. (usfa.fema.gov)
Do smoke alarms really need to be replaced if they still “beep” when tested?
Many organizations recommend replacement based on age; the American Red Cross notes smoke alarms that are 10 years old should be replaced because sensors can become less sensitive over time. (redcross.org)
What does “Class 350” mean for document protection?
“Class 350” is commonly used to describe fire protection aimed at keeping interior temperatures at or below about 350°F for the rated time period—helpful for paper documents. (safesandmore.com)
Should I anchor a heavy safe to my concrete floor?
Anchoring can improve stability and help keep placement consistent. Concrete anchoring typically involves drilled holes and purpose-built anchors; the right method depends on your floor, safe design, and whether you may move the safe later. If you’re unsure, consult an installer or qualified professional. (maden.co)
Glossary
Loadout (gear loadout): A repeatable set of items you prepare and store as a single kit, so you can confirm readiness quickly.
Module system: Organizing gear into functional groups (Essentials, Calling, Optics, Tools, Comfort) so you can pack consistently and swap only what changes.
Fire classification (e.g., “Class 350”): A common way to describe fire protection intended to keep safe interior temperatures below a specified threshold (often referenced as 350°F for paper) for a rated time. (safesandmore.com)
Anchoring: Securing a safe to a floor (often concrete or wood) using appropriate fasteners/anchors to improve stability and reduce movement over time. (maden.co)